Posts

Synology NAS Python API
Image
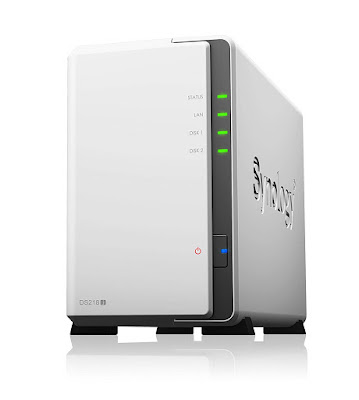
Synology Python API This article goes a little off topic as it deals with a module written by me in Python 3 for, who knows it, our beloved Synology NAS. DS218J one of the many models available The NAS in the image is only an example as the module will work with all DS series models. Synology is an easy-to-use home and office NAS, accessible wherever you are thanks to its easy to understand and set up interface. DS user interface If you use a lot of python, to be precise python 3, and you like to create scripts or applications with this programming language, more over if you have a NAS of this kind, this wrapper could be for you. link to the wrapper: https://github.com/N4S4/synology-api All instructions are included on the Github page, I will explain the installation and functions available in this wrapper. To begin: If you are on this page I assume that you are already familiar with python. There are two methods to install this module, the easiest one is via pip install, in case you

Home Made Weather station with Arduino

Image
Home Made Weather station with Arduino Home Made Weather station with Arduino Many like me are thirsty for information, have always wanted to self-produce a simple home weather station to monitor the environmental conditions inside the house. Not long ago I decided to interface an Arduino board with the fantastic free IOT platform Thingspeak, so I can check the environmental data of my home at any time and anywhere. In this tutorial we will see how to send values ​​of Temperature, Pressure, Humidity and flame presence of your home to the Thingspeak platform. First things First Creating a free account on Thingspeak.com is simple, go to the address and click on the top right of "Register". Once registered and logged in, just click on the "Channels" drop-down menu at the top and then on "My Channels" When you are on "My Channels" page click on "New Channel" Enter all the necessar

Control a Relay with Arduino according to the Temperature

Image
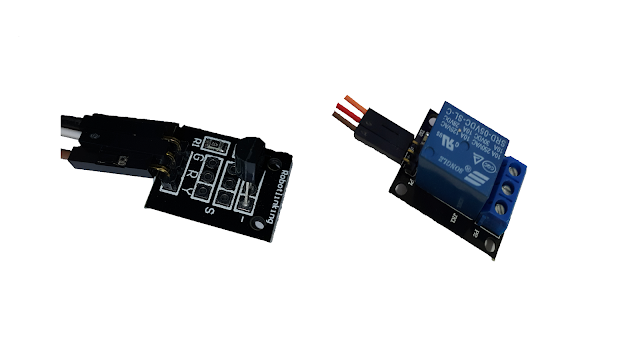
Control a Relay with Arduino according to the Temperature Control a Relay with Arduino according to the Temperature Sometimes it is necessary to check high voltage equipment (such as appliances, lights, etc.) based on values. Today we will see how to control a Relay, which can turn on other high voltage equipment, via an Arduino card according to the temperature values. For my tutorial I will use a Dallas Ds18b20 temperature sensor but any sensor will be fine by changing the code appropriately. What is needed:  x 1 Ds18b20 temperature sensor.  x 1 Relay Module.  x 1 Arduino Card whatever it is.  Cables for connection. Assembling We connect components in this way: Temp Vcc Sensor --- Arduino 5V Temp GND Sensor --- Arduino GND Temp Data Sensor --- Arduino Pin 2 Relay Vcc --- Arduino 5V GND Relay --- Arduino GND Signal Relay --- Arduino Pin  Source code Conclusions The circuit and the program is very simple, hence it

Build a DIY IR Remote Controlled Arduino Lego Car

Image
Build a DIY IR Remote Controlled Arduino Lego Car Build a DIY IR Remote Controlled Arduino Lego Car Who has never dreamed of an Auto RC or better yet build one? With an old Lego set found in my junk, I've been trying, in recent days, to create a small RC car controlled by a IR remote control. The result will not be the the best performance because the remote control is not a good solution for long distances, as reception can be disturbed may not respond properly to commands. What do we need? Ingredients: Arduino Nano o UNO x1 Stepper motor x1 Servo Motor  x1 IR receiver module + Remote A lego Set with at least 3 wheels Assembling Let's connect all the modules to the Arduino in the following way:  Servo Vcc  ---  Arduino 5V  Servo GND ---  Arduino GND  Servo Data  ---  Arduino D5 Stepper Driver Vcc  ---  Arduino 5V   Stepper Driver GND --- Arduino GND  Stepper Driver IN1 ---  Arduino D8 Stepper Driver IN2 ---  Ar

Show Temperate and Humidity on an OLED screen 128x64 pi

Image
Show Temperate and  Umidity on an OLED screen 128x64 pi Show Temperate and  Umidity on an OLED screen 128x64 pi Living on an island I'm used to a fairly high humidity rate, especially in summer, the evening is almost unbearable. I was curious to know how much moisture saturation (%) was in my house, then in the future logging data on an SD card to compare the data with the dehumidifier switched on and not ..... but we will talk about this later on! Today we talk about how to display data on an OLED screen of the smallest size of just 0.96 " Let's Prepare the Soup What you need: Arduino nano  (or any other you have available) OLED Screen 0.96" DHT11  module Cables  F-F  type (or M-M in case on Arduino UNO) Wiring Up Now let's connect the modules with our Arduino Nano. Having Male Pin on Arduino and Modules I do not need a Breadboard as the links will be direct. If in your case it is different a

Use a Telegram Bot to receive data from a Thingspeak channel

Image
Use a Telegram Bot to receive data from a Thingspeak channel Use a Telegram Bot to receive data from a Thingspeak channel Lately I've been playing around Telegram and its infinite functions, as, the very interesting one of the Bots. Having, in the past, linked an Arduino UNO to a Thingspeak channel, I wanted to write a script on my RPI Zero to program a Telegram Bot to allow it to respond some simple commands.  Not finding any guide around (or at least that I seen) I decided to post a little guide on my own here. ASSUMPTIONS: That you have a Public or Private channel on Thingspeak where to retrieve data from. That you have a machine where Python 3 runs Ex RPI What You Need:  A Telegram Account and a Bot on it Thingspeak  Account Raspberry Pi  To create a bot you'll need to add "@BotFather" to Telegram and send him a message "/newbot", once all data needed is inserted (it is very easy just follow BotFather&#